distortions, scratches, or any other damage to the cone seat sealing
surface, or to the finish that can affect the corrosion resistance of
the fitting.
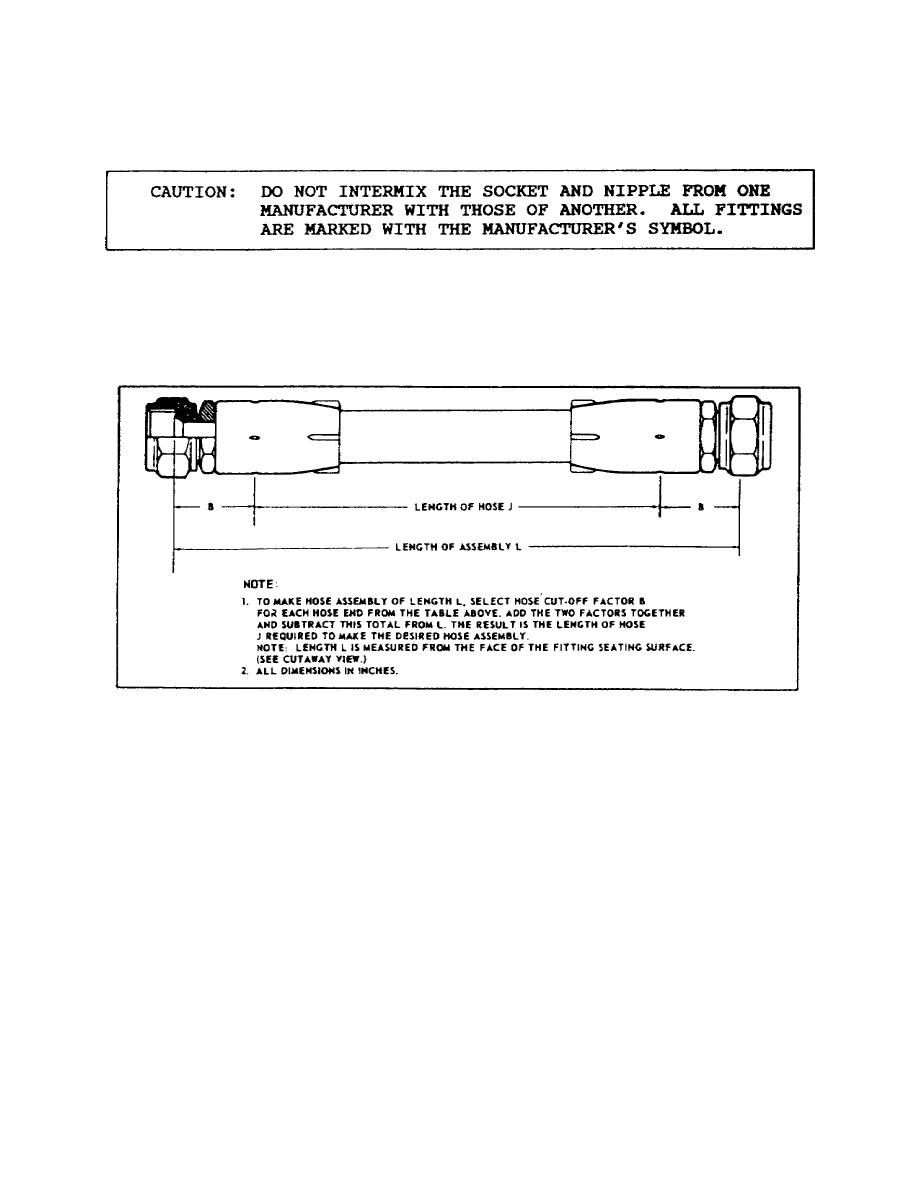
After the hose and fittings have been inspected, determine the
correct length of hose required as shown in Figure 2-15.
Cut the
hose squarely, using a fine tooth hacksaw; then, using compressed
air, clean the hose to remove all cutting residue.
Figure 2-15.
Determination of Correct Hose Length.
Assembly of the hose and fittings is illustrated in Figure 2-16,
and outlined in the following steps:
Place the socket in a vise and screw the hose into the socket
counterclockwise until it bottoms out; then back off the hose
1/4 of a turn. CAUTION: DO NOT OVERTIGHTEN THE VISE ON THIN-
WALLED SOCKETS OF LIGHTWEIGHT FITTINGS.
Tighten the nipple and the nut on the appropriate assembly tool
from Aeroquip Kit, Part No. S-1051.
Lubricate the nipple threads and the inside of the hose
liberally, using a lightweight motor oil or hydraulic fluid,
MIL-H-5605 or MIL-H-83282.
55
AL0907


 Previous Page
